
 By Reynand Wu
Securing a blue checkmark on Instagram has long been the digital equivalent of a velvet rope. Once reserved strictly for celebrities, global corporations, and high-profile public figures, that coveted badge instantly signals authenticity, authority, and status. However, the ecosystem of social media verification has fundamentally shifted. Today, the platform offers two distinct pathways to achieve verification: the legacy free review process and the subscription-based Meta Verified program.
Whether you are an emerging content creator, a growing local business, or a digital marketing agency mapping out an effective social strategy, understanding how Instagram verification works, what it costs, and how to successfully navigate a denied request is critical to building a robust online presence.

What Does Instagram Verification Actually Mean?
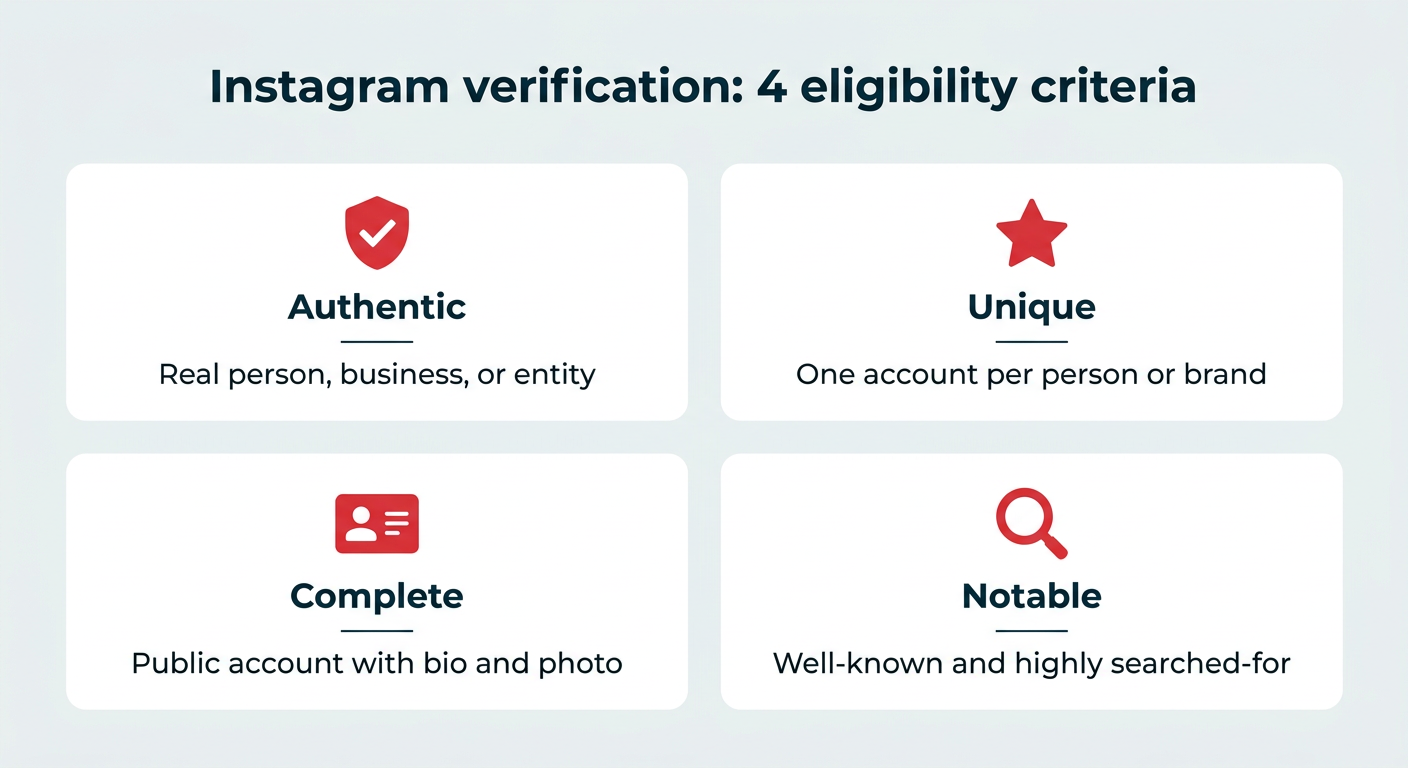
At its core, Instagram verification is the process of earning a blue checkmark badge that sits proudly next to a profile username. Functionally, this badge serves a singular, crucial purpose: it tells other users on the platform that an account genuinely belongs to the authentic person, artist, brand, or organization it claims to represent.
For years, the process of awarding this badge was shrouded in mystery. Handled entirely by internal moderation teams, traditional verification was exclusively restricted to "notable and unique" entities. If you weren’t headlining concert tours, starring in blockbusters, or driving massive search engine queries, earning that blue tick was virtually impossible.

That landscape transformed with the introduction of Meta Verified. By establishing a paid subscription model, Meta opened up verification to everyday users and brands alike, democratizing access to the checkmark.
Today, whether an account earned its badge through traditional, merit-based means or through a paid subscription, the visual result is identical. The blue checkmark looks the same to the casual observer, making it impossible to tell at a glance whether an account qualified through high-profile public notability or paid for the service.

Two Paths to the Badge: Traditional Verification vs. Meta Verified
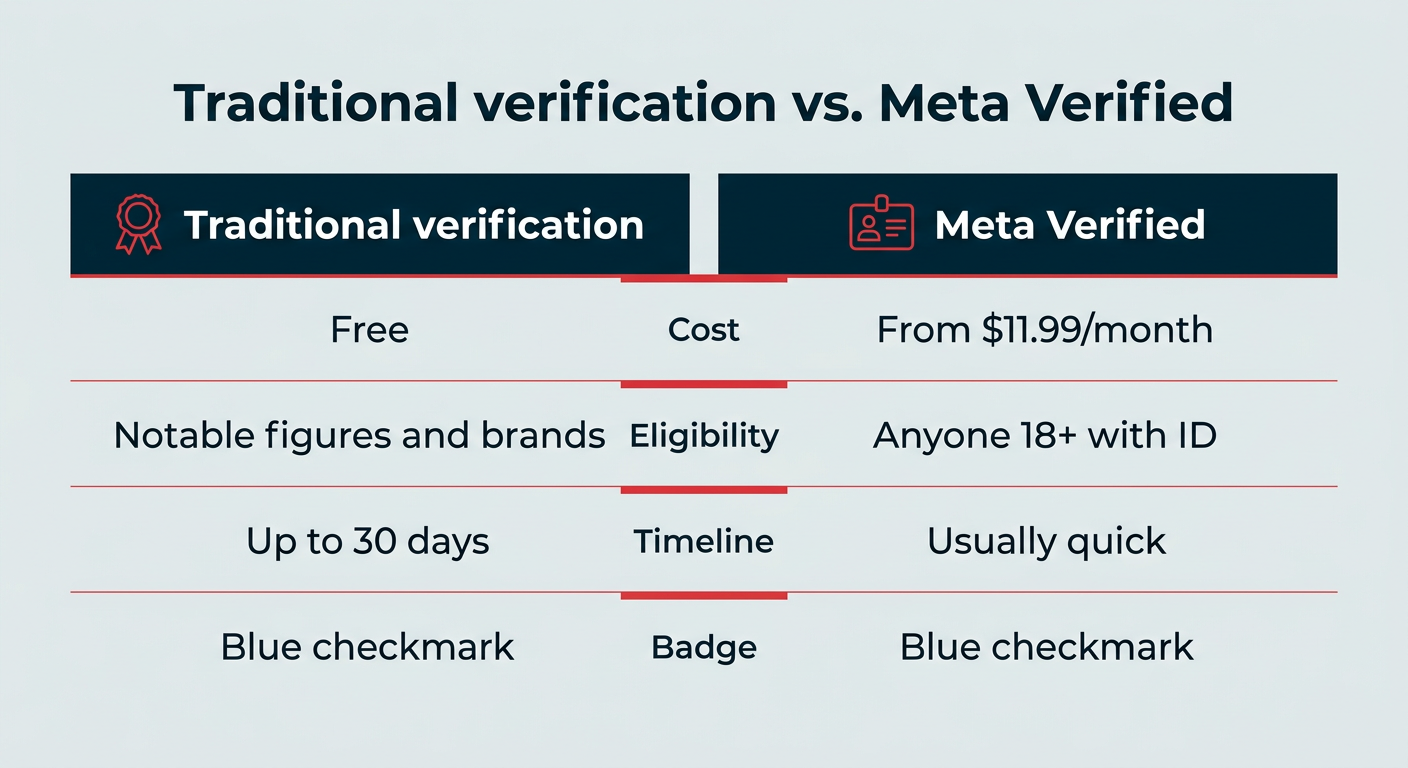
Choosing the right verification route depends heavily on your current digital footprint, budget, and brand recognition. Below is a detailed breakdown of how the two methods compare across cost, eligibility, and perks.
| Feature | Traditional Verification | Meta Verified |
|---|---|---|
| Cost | Free | From $11.99/month on the web ($14.99/month on iOS/Android) for individuals; tiered business pricing |
| Eligibility | Notable public figures, celebrities, brands, and organizations | Anyone 18+ with a valid government-issued ID and a qualifying profile |
| Application Process | Submit an in-app form with authenticity and notability documentation | Subscribe via app settings, then confirm identity with a government ID |
| Timeline | Typically a decision within 30 days | Usually rapid once the ID is reviewed |
| Badge Appearance | Identical blue checkmark | Identical blue checkmark |
| Additional Benefits | Badge and search visibility | Proactive impersonation monitoring, direct account support, exclusive stickers |
| Availability | Global | Select countries (continuously expanding) |
If your name or business is regularly featured in press publications or actively searched for online, applying for traditional verification is the logical first move since it costs nothing. If you lack that high-profile mainstream notability, Meta Verified offers a fast, reliable alternative.

Step-by-Step: How to Request Traditional Verification
If you believe your profile meets the stringent "notability" criteria, you can submit a free application directly through the Instagram mobile app. Keep in mind that this request cannot be completed via a desktop browser.
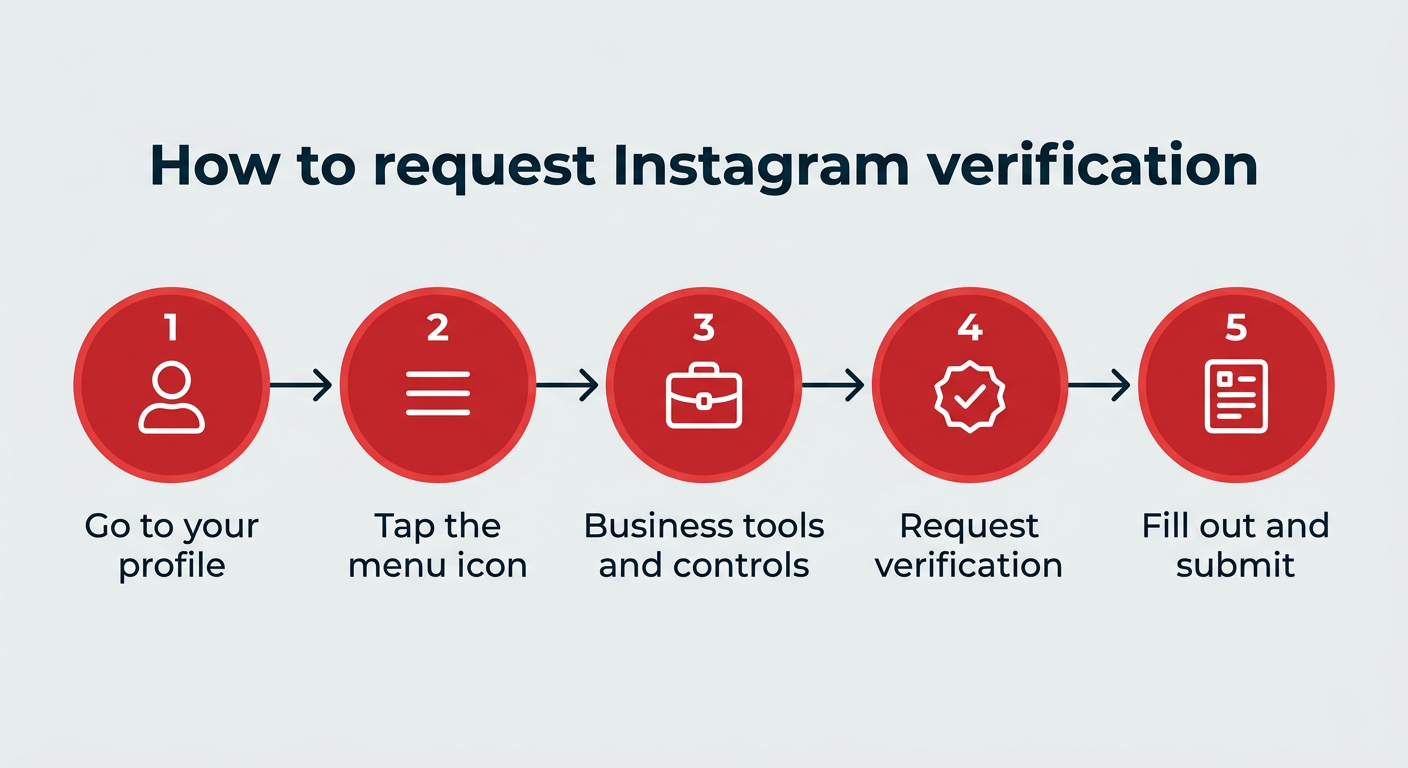
Step 1: Access Your Profile Settings
Open your Instagram app, ensure you are logged into the exact account you wish to verify, and tap your profile picture in the bottom-right corner.
Step 2: Open the Hamburger Menu
Tap the hamburger menu icon (three horizontal lines) located in the top-right corner of your profile screen to open your Settings and activity menu.
Step 3: Navigate to Business Tools and Controls
Scroll downward until you find the For professionals section. Tap on Business tools and controls (or creator controls, depending on your account classification).
Step 4: Select Request Verification
Scroll to the very bottom of this sub-menu and tap the blue Request verification link.
Step 5: Fill Out the Application Form
You will be prompted to complete a multi-step form confirming your authenticity and notability. You will need to provide:
- Your full legal name or registered business name.
- Confirmation of your category (e.g., News/Media, Sports, Government/Politics, Music, Fashion).
- Optional but highly recommended links to news articles, social media profiles, or official websites proving public interest.
Once submitted, Instagram typically reviews requests and issues a decision within 30 days. If denied, you can reapply after the cooling-off period.
Step-by-Step: How to Get Verified with Meta Verified
For creators and brands that cannot clear the high bar of traditional notability, Meta Verified provides a straightforward transactional alternative.

- Navigate to Verification Settings: Follow the same path outlined above (Profile > Hamburger Menu > Business Tools and Controls > Request Verification).
- Select Meta Verified: At the top of the request screen, look for the prompt under the Before you start header. Alternatively, you may see a prompt directly in your account settings to join the waitlist or unlock benefits.
- Unlock Benefits and Subscribe: Review the tier pricing relative to your region and platform (noting that web sign-ups are generally cheaper than iOS/Android in-app purchases due to app store fees).
- Verify Your Identity: Submit a photo of a government-issued photo ID that matches the name and profile photo on your Instagram account. Once the ID is cleared, your badge will be activated.
6 Proven Strategies to Improve Your Verification Odds
If you are aiming for traditional verification—or simply want to build a bulletproof, highly credible profile ahead of a Meta Verified application—implementing these best practices is essential:
1. Optimize Your Instagram Profile
Your profile is your digital storefront. Ensure your bio is fully fleshed out, your profile picture clearly represents you or your brand logo, your category is accurately selected, and your external link directs traffic to a verified web property. Optimization builds immediate trust before a human moderator ever reviews your application.

2. Post Consistently and Actively
Instagram favors active community members. Sharing content once a week may not be enough to signal a thriving, engaged presence. Aim for a consistent daily or near-daily cadence. Utilizing social media scheduling tools can help maintain this rigorous posting schedule effortlessly.
3. Leverage Collaborations
According to prominent social media growth strategists, utilizing Instagram’s collaboration feature is a gold standard for organic growth and credibility. Partnering with other verified or highly authoritative accounts signals to the algorithm that you are an active, trusted participant in your industry’s ecosystem.

4. Showcase True Authenticity
Authenticity goes beyond simply being a real person. Show the behind-the-scenes reality of your business, introduce actual team members rather than relying heavily on generic stock photography, and ensure your brand voice matches your real-world identity.
5. Build an Off-Platform Digital Footprint
Because traditional verification relies heavily on "notability," Instagram evaluates your presence outside the app. To prove your influence, work on earning organic mentions in reputable news outlets, guest blogging on industry sites, maintaining an active Wikipedia page (if eligible), and optimizing your search engine presence.

6. Avoid Third-Party Scams
Never trust third-party agencies or direct messages claiming they have an "inside connection" at Meta who can guarantee verification for a cash fee. These are almost universally phishing scams designed to steal your login credentials or harvest your personal ID documents. Stick strictly to in-app channels.
What to Do If Your Verification Request Is Denied
Receiving a rejection notice from Instagram can be frustrating, but it is far from permanent. Instagram rarely provides detailed feedback regarding why an application failed, but rejections typically stem from four main issues: incomplete documentation, mismatching identity records, insufficient web presence, or a lack of searchable notability.

If your request is denied, take these steps:
- Audit Your Profile: Check that your name, bio, and visual branding are consistent across all platforms.
- Strengthen Your Press Mentions: Spend a few months securing media coverage, press releases, or interviews on external websites before reapplying.
- Wait and Reapply: Respect the platform’s cooldown periods. Alternatively, consider pivoting to a Meta Verified subscription if your immediate goal is simply to secure the badge and access customer support features.
Frequently Asked Questions
How many followers do you need to get verified on Instagram?
There is no official minimum follower requirement for either traditional or Meta Verified accounts. However, traditional verification requires proof of public notability, which typically correlates with a larger, highly engaged audience and off-platform press coverage.

Can I get verified on Instagram with 1,000 followers?
Yes. Because there is no hard floor on follower counts, you can technically apply with 1,000 followers. However, your approval odds will rest entirely on whether you can prove external notability and search demand.
Does verification boost algorithmic reach?
Instagram has repeatedly clarified that holding a blue checkmark does not directly alter the algorithm to grant your posts more organic reach or impressions. However, it does enhance your visibility in search results, comment sections, and builds instant consumer trust that naturally drives higher engagement.

Can I lose my Instagram verification badge?
Yes. Instagram can strip away your verification badge if you violate the platform’s Terms of Use or Community Guidelines, or if it is discovered that you submitted fraudulent documentation during the application process. For Meta Verified users, the badge will automatically disappear if the monthly subscription is cancelled.
 Nana Muazin
  Asro
Asro  Basiran